How do I set 4011A function generator to operate with 220V/230V AC Line input?
2020-01-15
- Remove the 4 screws underneath the instrument. Pull out the entire bottom piece of the cover so that you can see the PCB inside clearly. Near the top part where the AC input receptable is close to, some cables out of that receptable are already connected to the PCB.
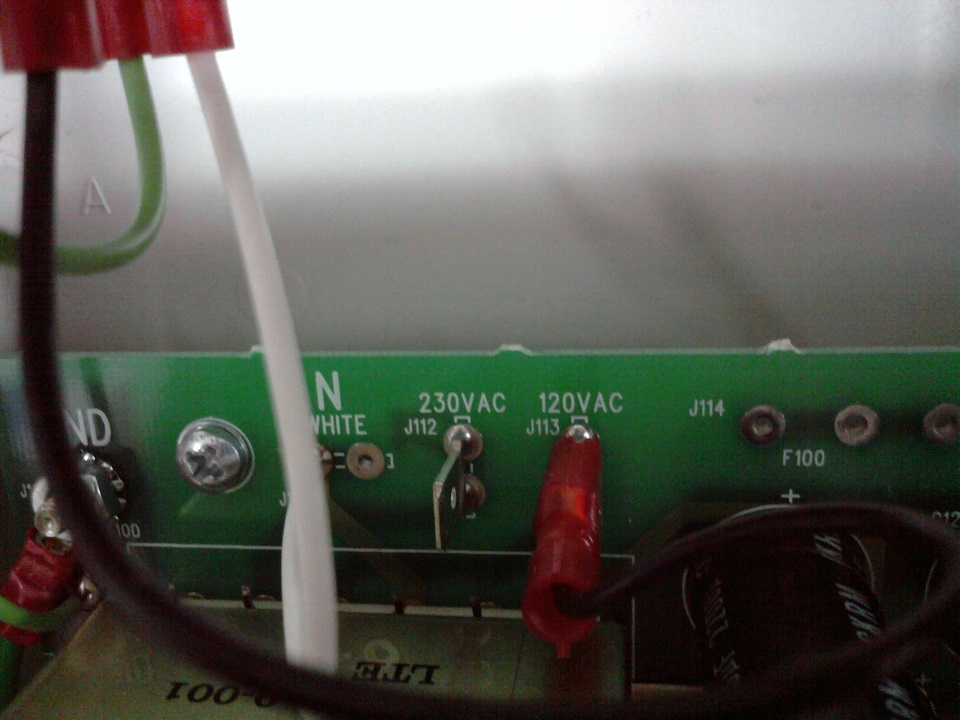
- Locate one that is connected to the top edge of the board where it says 120VAC, J113. Unplug and connect it to 230VAC, J112 pins. See image below:
- After switching, reassemble the case back together and tighten back the 4 screws underneath the generator.
- Locate the fuse box in the rear panel of the instrument and remove the fuse.
- Make note of the fuse rating on the fuse and replace it with a fuse that has half that rating (i.e. If it is 1A, replace with 500mA). This is only for 220V AC line operation only.
- If there is an label on the fuse box that shows 110V, flip or rotate the fuse holder until it shows or indicates for 220V operation.
- Place fuse box back in place, and now the 4011A should be useable with 220V AC line input power.
Related Articles